I have been playing with wCK Servo from RoboBuilder for a while now. This servo packs quite a punch:
- Built-in PID controller
- I/O pins (1 ADC input, 2 digital output)
- Serial interface
- Control multiple servos on a multi-drop bus network
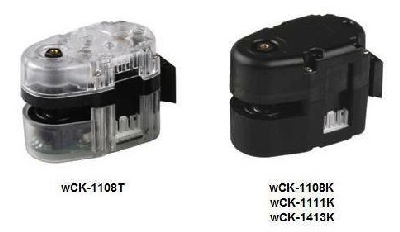
Its user manual is pretty comprehensive, it has everything you will need to know to run this bad boy. It comes in different variants, I am using wCK-1111 - it has max power of 1.1 W and delivers 11 kg.cm torque.
Lets first try to get it running via a computer using serial port (or USB-to-Serial converter). Download the official Windows (only) program - wCK Programmer. This program can be used to configure parameters (ID, baud rate, PID gains) and issue motion commands (move to a position, rotate CW/CCW) to servo. The program itself is self-explanatory. However, since I am on OS X I wanted something native, so here is a small Python script that communicates with the servo - wck.py. Not all functions of wCK Programmer have been ported but it includes the basic stuff.
Right out of the package, wCK servo will come with following default parameters:
| Baud Rate | : 115200 bps |
| P gain | : 20 |
| D gain | : 30 |
| I gain | : 0 |
| ID | : 0 |
| Over current limit | : 400 mA |
| Angle range | : 1 -254 |
wCK exposes identical 4-pin terminal on either side. These pins are for Tx, Rx, Gnd and Vcc. Wire the 4 pins with corrosponding pins on your serial port (I am using a USB-to-USART converter) This is trival but here it goes - Tx of Servo goes to Rx of serial port, vice versa. wck.py is basically a Python class, so lets start by firing up the Python console:
$ python
Now import the servo class from wck library and initiate the class with serial port, baudrate and servo ID:
>>> from wck import servo
>>> a = servo("/dev/tty.SLAB_USBtoUART",115200,0)
If you do not know the servo ID or the baud rate, run the scan function. This is a brute force method to determine baudrate and ID the servo will respond to:
>>> a.scan()
Here are some basic functions to move servo to a specified position, read the position, drive the servo in CW direction and CCW direction:
>>> a.pos(4,102)
>>> a.readPos()
>>> a.cw(12)
>>> a.ccw(12)
>>> a.ccw(0)
The last command will stop the servo.
Now lets use Arduino to control this servo. Download this Arduino wCK servo library. Here is an example sketch:
#define SERVO0  0
Wckservo servo(SERVO0);
uint8_t angle;
uint8_t dir;
uint8_t ret;

void setup() {
  Serial.begin(115200);
  while (!Serial)
  ;
  Serial.println("Ready!");
  angle = 1;
  dir = 0;
  ret = servo.posMove(1,1);
  servo.rotateCW(1);
  delay(5000);
  servo.rotateCW(0);
  Serial.write(ret);
}

void loop() {
  if (Serial.available() > 0) {
    ret = Serial.read();
    if(ret == 'a')
      servo.rotateCW(1);
    else if(ret == 'b')
      servo.rotateCW(0);
    else if(ret == 'c')
      servo.rotateCCW(1);
    else{
      ret = servo.posMove(1,angle);
      Serial.write(ret);
      Serial.print("Angle:");
      Serial.println(angle);
      Serial.flush();
      if(dir==0 && angle <= 254)
        dir = 0;
      else
        dir = 1;
      if(dir==1 && angle >= 1)
        dir = 1;
      else
        dir = 0;
      angle = (dir)? angle-5 : angle+5;
    }
  }
}